Key Takeaways
- Solar charge controllers are essential to protect batteries in a solar power system.
- There are two main types of controllers: PWM (Pulse Width Modulation) and MPPT (Maximum Power Point Tracking).
- Choosing the right charge controller depends on your solar system’s size and your energy needs.
- The best solar charge controllers for tiny homes include models from Renogy, Victron, EPEVER, and OutBack.
- Proper installation and maintenance of your charge controller can extend the life of your solar power system.
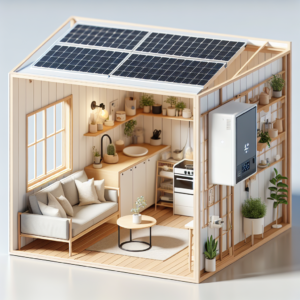
As a tiny homeowner, you’re part of a growing movement towards sustainable living. Solar power is a key component of that lifestyle, and understanding how to harness this energy efficiently is crucial. That’s where solar charge controllers come in.
Why Charge Controllers are Crucial for Your Tiny Home
Think of a charge controller as the heart of your solar power system. It pumps life into your batteries without overcharging them, which can lead to reduced lifespan or even damage. For tiny homes, where space and efficiency are paramount, having a reliable charge controller means you can make the most of your limited roof space for solar panels and ensure your system runs smoothly.
Solar Charge Controllers Explained
Defining the Role of Charge Controllers in Solar Systems
A solar charge controller’s role is simple: to regulate the voltage and current coming from the solar panels to the batteries. But this simple task is critical for preventing overcharging and ensuring the longevity of your power storage. With the right controller, you can rest assured that your batteries will be treated with care, keeping you powered up for years to come.
Here’s how it works: as your solar panels absorb sunlight, they generate direct current (DC) electricity. This electricity needs to be stored in your batteries for later use, especially at night or on cloudy days. But batteries have limits on how much and how fast they can be charged. The charge controller steps in to make sure that these limits are not exceeded.
Choosing the Right Charge Controller
Understanding Your Energy Needs and Solar System Capacity
The first step in choosing a charge controller is understanding your energy needs. How much power do you use daily? What are the peak power requirements for your tiny home? Once you have these numbers, you can look at the capacity of your solar system. The size and number of solar panels, as well as the battery bank’s capacity, will dictate the type and size of the charge controller you’ll need.
PWM vs. MPPT: Which Suits Your Tiny Home Best?
Before we explore the best controllers on the market, it’s important to understand the two main technologies: PWM and MPPT.
Now, let’s break down the two main types of controllers:
- PWM: These are great for smaller systems with a lower budget. They’re less expensive but also less efficient, especially if the solar panel voltage is significantly higher than the battery voltage.
- MPPT: These are ideal for larger systems and can be more cost-effective in the long run due to their higher efficiency. They’re particularly useful in colder climates or when the solar panel voltage is much higher than the battery voltage.
Most importantly, the choice between PWM and MPPT will depend on your specific circumstances, including budget, system size, and environmental factors.
Best Charge Controllers on the Market
1. Renogy Wanderer: The Budget-Friendly Choice
When it comes to balancing cost and functionality, the Renogy Wanderer stands out. This PWM charge controller is a solid option for tiny homeowners who are just starting out with solar. It’s simple to use, easy to install, and comes with enough features to keep your system running efficiently without breaking the bank.
2. Victron SmartSolar MPPT: Smart Features for Tiny Homes
The Victron SmartSolar MPPT controller is a step up, providing smart connectivity and a range of features that allow for precise control over your solar power system. Its Bluetooth connectivity lets you monitor and adjust settings right from your smartphone, making it a convenient choice for the tech-savvy homeowner.
3. EPEVER Tracer AN Series: Versatility Meets Efficiency
- High tracking efficiency of up to 99.5%
- Multiple load control modes for various applications
- Comprehensive system protection features
EPEVER’s Tracer AN Series offers a balance of versatility and efficiency. With a user-friendly interface and the ability to handle a wide range of voltages, this MPPT charge controller is suitable for those looking to get a bit more from their solar setup without going overboard on price.
4. OutBack Flexmax: The Heavy-Duty Contender
For those planning a more extensive solar array, the OutBack Flexmax is a heavy-duty MPPT charge controller capable of managing up to 80 amps of power. It’s designed to work with a variety of battery types and offers an adjustable charging profile to maximize battery life and performance.
5. Morningstar ProStar PWM: Reliability for a Modest Setup
The Morningstar ProStar PWM is a tried-and-true option for those with a modest solar setup. Renowned for its reliability and durability, this controller is a great choice if you’re looking for a straightforward solution that you can count on for years to come.
Setting Up Your Charge Controller
Installation Guide: Step-by-Step to Energy Independence
Installing a solar charge controller isn’t as daunting as it might seem. Here’s a step-by-step guide to get you started:
- Determine the best location for your charge controller. It should be close to the batteries but in a well-ventilated area to prevent overheating.
- Mount the charge controller onto a surface, ensuring it’s securely fastened and in a position that allows easy access for monitoring and maintenance.
- Connect the charge controller to the battery bank first, following the manufacturer’s instructions to avoid any potential voltage spikes.
- Once the batteries are connected, hook up the solar panel wires to the charge controller, making sure the polarity is correct.
- Finally, if your system requires it, connect any load wires to the charge controller, ensuring it’s capable of handling the power requirements.
Always consult the manual for specific instructions related to your charge controller model, and if you’re ever in doubt, seek help from a professional.
Monitoring and Adjusting: Making the Most of Your Solar Investment
Monitoring your solar charge controller isn’t just about ensuring it’s functioning; it’s about optimizing your energy use. Most modern controllers come with monitoring capabilities, either through an LCD screen or via Bluetooth to your smartphone. This allows you to adjust settings for maximum efficiency and to track your energy production and consumption. Regularly checking these stats can help you make informed decisions about your energy usage and ensure your system is always running at peak performance.
Maintenance Know-How: Keeping Your System in Top Shape
Like any critical component, your charge controller requires regular maintenance to function optimally. This means:
- Checking connections for corrosion or wear and tightening them as needed.
- Ensuring the controller is free from dust and debris that could impede its performance.
- Monitoring the charge controller’s performance through its display or connected app to catch any potential issues early.
Remember, a little bit of maintenance goes a long way in extending the life of your solar power system.
Frequently Asked Questions
1.Can I Use Any Solar Charge Controller for My Tiny Home?
Not all solar charge controllers are created equal, and choosing the right one for your system is crucial. Factors such as the size of your solar array, the type of batteries you’re using, and your energy consumption patterns all play a role in determining the appropriate controller. It’s important to select a controller that can handle the current (in amps) produced by your panels and one that’s compatible with your battery bank’s voltage.
2.How Do I Know If My Charge Controller Is Working Properly?
You’ll know your charge controller is working properly if your batteries are being charged efficiently without being overcharged or undercharged. Indicators on the controller itself, such as LED lights or an LCD display, will show the charging status and any fault messages. Consistent monitoring through an app or monitoring system can also provide real-time data on your controller’s performance.
3.What Happens if I Use a Charge Controller That’s Too Small or Too Big?
Using a charge controller that’s too small for your system can lead to inadequate battery charging and even damage to the controller itself due to overload. Conversely, a controller that’s too large may be unnecessarily expensive and won’t provide additional benefits. Therefore, it’s important to size your charge controller based on the output of your solar panels and the capacity of your battery bank.
4.Are There Charge Controllers That Work with Different Types of Batteries?
Yes, many charge controllers are designed to work with various types of batteries, including lead-acid, lithium-ion, and others. Some controllers have adjustable settings to accommodate the specific charging requirements of different battery technologies. It’s vital to ensure that your controller’s settings are properly configured for the type of batteries you’re using to avoid any issues.
5.How Often Should I Check or Maintain My Charge Controller?
The frequency of checks and maintenance on your charge controller can depend on the model and the environment it operates in. Generally, a monthly check is a good practice to ensure all connections are secure and the controller is clean and free from debris. Additionally, keeping an eye on the system’s performance through regular monitoring can alert you to any potential issues that may require maintenance.